Step-by-Step Guide to HubSpot WordPress Setup
** **Before diving into the setup process, it’s essential to understand why integrating HubSpot with WordPress is beneficial. HubSpot is a robust marketing platform that offers tools for email marketing, social media management, content management, and analytics. On the other hand, WordPress is a versatile content management system (CMS) that powers millions of websites globally.
Leveraging HubSpot’s Capabilities
HubSpot’s suite of tools allows you to streamline your marketing operations. It provides robust analytics, enabling you to make data-driven decisions. By integrating with WordPress, you can harness these capabilities directly on your website without needing to juggle multiple platforms.
Seamless User Experience
Integrating these platforms provides a seamless experience for both you and your site visitors. Users can enjoy consistent interactions, while you benefit from streamlined data collection and analysis, helping you refine your marketing strategies effectively.
Enhanced Marketing Strategies
With HubSpot’s comprehensive tools, you can enhance your marketing strategies significantly. From targeted email campaigns to social media integration, aligning these with your WordPress site ensures you have a cohesive approach to engaging and retaining your audience.
Prerequisites for Integration
Before you start the integration process, ensure you have the following:
- An active WordPress website
- A HubSpot account (you can start with a free account and upgrade as needed)
- Administrative access to both your WordPress and HubSpot accounts
Setting Up Your WordPress Site
Ensure your WordPress site is up to date with the latest version. This not only guarantees compatibility with the HubSpot plugin but also enhances security and functionality. Regular updates are crucial to maintaining site performance.
Creating a HubSpot Account
If you haven’t already, create a HubSpot account. Starting with a free account is a great way to explore the platform’s offerings. As your needs grow, consider upgrading to access premium features that can further enhance your marketing efforts.
Administrative Access
Having administrative access to both platforms is vital. This ensures you can easily install plugins, make necessary changes, and troubleshoot any potential issues that may arise during integration.
Step 1: Installing the HubSpot WordPress Plugin
** **The first step in integrating HubSpot with your WordPress site is to install the HubSpot WordPress plugin. This plugin is free and available in the WordPress plugin repository.
Steps to Install the Plugin
- Accessing the WordPress Dashboard: Log in to your WordPress dashboard using your admin credentials. This is where you will manage all aspects of your site, including installing plugins.
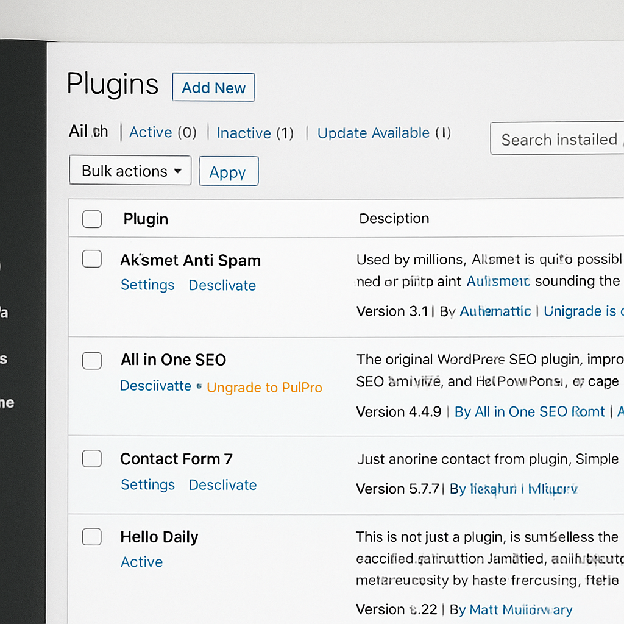
- Navigating to Plugins: Go to Plugins > Add New. This section allows you to browse and install a variety of plugins to enhance your site’s functionality.
- Searching for HubSpot: In the search bar, type “HubSpot” and look for the plugin named “HubSpot — CRM, Email Marketing, Live Chat, Forms & Analytics”. Ensure you select the correct plugin to avoid compatibility issues.
- Installing and Activating: Click Install Now, then Activate once the installation is complete. Activation is crucial as it enables the plugin’s features on your site, allowing you to start setting up your integration.
Understanding the Plugin’s Features
The HubSpot plugin offers a range of features that integrate seamlessly with WordPress. Understanding these features can help you utilize them effectively, enhancing your site’s marketing capabilities.
Troubleshooting Installation Issues
If you encounter issues during installation, such as errors or compatibility warnings, check your WordPress version and ensure all other plugins are up to date. Conflicts often arise from outdated software.
Step 2: Connecting HubSpot to Your WordPress Site
With the plugin installed, it’s time to connect your WordPress site to your HubSpot account.
Steps to Connect
- Initial Connection Prompt: After activating the plugin, you will be prompted to connect to HubSpot. This step initiates the integration process between your site and HubSpot.
- Logging into HubSpot: Click on the Connect your account button. If you’re not already logged into HubSpot, you’ll be redirected to the HubSpot login page. Enter your credentials and log in.
- Selecting Your HubSpot Account: Choose the HubSpot account you want to connect to your WordPress site and click Connect App. This step links your site to your HubSpot account, allowing data and features to be shared seamlessly.
- Finalizing the Connection: Once connected, you’ll be redirected back to your WordPress dashboard. Here, you can access HubSpot’s tools directly from your WordPress site, streamlining your workflow.
Verifying the Connection
After completing the connection process, verify that the integration is successful. Check if HubSpot features are accessible from your WordPress dashboard and ensure data sync is operational.
Resolving Connection Issues
If the connection fails, double-check your login credentials and account permissions. Ensure there are no firewall or security settings blocking the integration process.
Step 3: Configuring HubSpot Features
Now that your WordPress site is connected to HubSpot, you can configure various features such as forms, live chat, email marketing, and analytics.
Setting Up Forms
- Accessing Forms: In your WordPress dashboard, go to HubSpot > Forms. This section allows you to create and manage forms effortlessly.
- Creating a New Form: Click Create Form to start building your form. Choose the type of form you want to create (e.g. pop-up form, embedded form) and use the drag-and-drop editor to customize it.
- Customizing and Publishing: Once finished, click Publish to make it live on your site. Ensure your form aligns with your site’s design for a cohesive user experience.
- Form Optimization Tips: Regularly analyze form performance using HubSpot’s analytics. Adjust form fields and design based on user interaction data to increase conversion rates.
Enabling Live Chat
- Setting Up Live Chat: Navigate to HubSpot > Live Chat in your WordPress dashboard. Click Create Chatflow and follow the prompts to set up your live chat settings.
- Customizing the Chat Widget: Customize the chat widget to match your site’s design and user preferences. Personalization enhances user engagement and satisfaction.
- Activating the Chat Feature: Activate the chat by clicking Publish. Regularly test the chat functionality to ensure smooth operation and immediate response capabilities.
- Best Practices for Live Chat: Train your team on effective communication strategies. Quick and helpful responses can significantly improve customer satisfaction and retention.
Email Marketing and Analytics
HubSpot also allows you to manage email marketing campaigns and track site analytics directly from your WordPress dashboard. Simply navigate to the respective sections under the HubSpot menu to start setting up your campaigns and view analytics data.
Crafting Effective Email Campaigns
Design visually appealing and relevant email campaigns. Segment your audience based on demographics or behavior to send targeted messages that resonate with recipients.
Utilizing Analytics for Insightful Decisions
Leverage HubSpot’s analytics to gain insights into user behavior and campaign performance. Use this data to refine your marketing strategies and optimize your site’s conversion paths.
Step 4: Utilizing HubSpot CRM
** **by Andrés Dallimonti (https://unsplash.com/@dallimonti)
One of the significant advantages of integrating HubSpot with WordPress is the ability to use HubSpot CRM to manage your contacts and track customer interactions. Here’s how you can utilize the CRM:
Managing Contacts
- Accessing Contacts: Access the Contacts section under HubSpot in your WordPress dashboard. View all your contacts, add new ones, or import contacts from other platforms.
- Tracking Interactions: Use the contact timeline to track interactions and manage customer relationships efficiently. This feature provides valuable insights into customer behavior and preferences.
- Organizing Contacts Effectively: Organize contacts using tags or lists to streamline communication and marketing efforts. Segmenting contacts allows for more personalized and targeted interactions.
- Improving Customer Relationships
Leverage CRM data to build stronger customer relationships. Personalize communications based on interaction history and customer preferences to enhance satisfaction and loyalty.
Automating Marketing Efforts
With HubSpot’s automation tools, you can create workflows to automate repetitive marketing tasks. This can include sending follow-up emails, assigning tasks to team members, and more.
Creating Automated Workflows
Design workflows that automate routine tasks, freeing up time for more strategic initiatives. Automation improves efficiency and ensures consistent customer engagement.
Measuring Automation Success
Regularly review the performance of your automated workflows. Adjust triggers and actions based on results to enhance effectiveness and achieve desired outcomes.
Troubleshooting Common Integration Issues
While the integration process is generally straightforward, you might encounter some issues. Here are some common problems and their solutions:
- Plugin Not Installing: Ensure your WordPress version is up to date, as the HubSpot plugin requires the latest version of WordPress.
- Connection Errors: Double-check your HubSpot login credentials and ensure there are no firewalls or security settings blocking the connection.
- Feature Limitations: Some features may require a paid HubSpot plan. Make sure your HubSpot account level supports the features you want to use.
Resolving Installation Problems
If the plugin won’t install, check your server settings and permissions. Ensure your hosting environment meets the plugin’s requirements for successful installation.
Addressing Connection Challenges
For persistent connection issues, contact HubSpot support for assistance. They can provide detailed guidance based on your specific situation and account settings.
Understanding Feature Accessibility
Review HubSpot’s pricing and feature tiers to ensure your account level matches your marketing needs. Upgrade if necessary to access advanced features and capabilities.
Conclusion
Integrating HubSpot with your WordPress site can significantly enhance your marketing capabilities, providing you with the tools to capture leads, engage with visitors, and analyze performance all within your website. By following this step-by-step guide, you can seamlessly set up HubSpot on your WordPress site and start reaping the benefits of a unified marketing platform.
Benefits for Small Business Owners
Whether you’re a small business owner or a marketing manager, this integration is a powerful way to boost your online presence and drive growth. Small businesses can particularly benefit from streamlined operations and enhanced customer engagement.
Ongoing Optimization Strategies
Continuously monitor and optimize your integrated system. Regularly update your strategy based on analytics insights and evolving marketing trends to maintain a competitive edge.
Future-Proofing Your Marketing Efforts
Stay informed about updates and new features from both HubSpot and WordPress. Embracing new technologies and tools ensures your marketing efforts remain effective and future-proof.